How To Publish First Comments
Add first comments to your posts for Instagram Business Profiles, Facebook Pages as well as Linkedin Company Pages & Personal Profiles right from the Post Editor. 🥳
If you've been looking to keep your Instagram posts tidy by adding all of your hashtags to your first comment or start engaging with your audience on your Facebook and LinkedIn posts right away, we've got you covered.
Simply create, schedule, and automatically post the first comment along with your post via SmarterQueue. 💪
In This Article
- How Do I Add A First Comment To My Post?
- How Does My First Comment Work With Multiple Social Profiles?
- How To Create First Comments With The AI Caption Writer
How Do I Add A First Comment To My Post?
You can easily add the first comment to your posts from within the Post Editor. You can do this as you create new posts to send to your Queue, or by editing already existing posts that are waiting to be published.
1. Head over to " Create a Post" or edit an existing post.

2. Create your Post or make any necessary edits: choose a Category, select the Social Profile(s) you want to post to, and add your text and media components.

Note: For Instagram Business Profiles, you must first enable direct publishing in order to have the "Add First Comment" option come up in the Post Editor.
3. Select "Add First Comment" to add the first comment to the post.

4. Add your first comment - this will automatically update the post's preview on the right-hand side, within the Preview pane, to show what the post will look like with the first comment added.

Note: Instagram allows a maximum of 30 hashtags to be published with a post. If you're publishing to Instagram and adding hashtags to both your post and the first comment, the total number between them can't be over 30.
5. Then select (or edit, if necessary) your Post Timing and Evergreen Post Recycling options and save/publish the post. 💪
💡 Note: You can easily convert your Personal Instagram Profile into a Business one and start adding first comments to your posts.
How Does My First Comment Work With Multiple Social Profiles?
SmarterQueue allows you to schedule and publish content for multiple social profiles at the same time.
While the "First Comment" feature is only available for Instagram Business Profiles, Facebook Pages, and LinkedIn Profiles and Company Pages, you can still schedule your content for all of the required social platforms, and add your first comment only to the desired supported profiles.
Adding Multiple Supported Social Profiles
If you select an Instagram Business Profile, a Facebook Page, and a LinkedIn Profile/Page for your post, the content you add in the "First Comment" box will be used for all three social profiles by default and will be visible in the previews for all the resulting posts.

That said, you don't have to add the first comment to all three social profiles. Simply uncheck the box for the ones you'd like to publish the regular post, without the first comment.

Adding Both Supported And Unsupported Social Profiles
When creating your post, you can select any or all of the social profiles that you've connected to your SmarterQueue account.
Any information you add in the "First Comment" field will only be applied to supported social profiles, while your post will be published to all selected platforms.

In the example above, we've added multiple social profiles. We can see in the Preview pane that the first comment is visible for Instagram, but not for Pinterest, which isn't supported.
How To Create First Comments With The AI Caption Writer
The AI Caption Writer is a great tool to quickly generate amazing text options for your posts, including for the First Comments. With only a couple of clicks, you can have multiple great quality options to pick from and take your post to the next level.
1. To get started, choose a Category, select the Social Profile(s) you want to post to and add your text and media components.

Note 💡: If you don't have your text ready, or you'd like a better version, you can use the AI Caption Writer to come up with the best caption too 💪
- Click on the "magic wand" icon in the bottom right of the text box. This will auto-fill the AI Caption Writer with your text caption and the "Re-write" prompt.

- Make any adjustments, such as choosing a new prompt, or adjusting the text in the box.

- Pick the tone for your result(s), and if you want any hashtags or emojis.
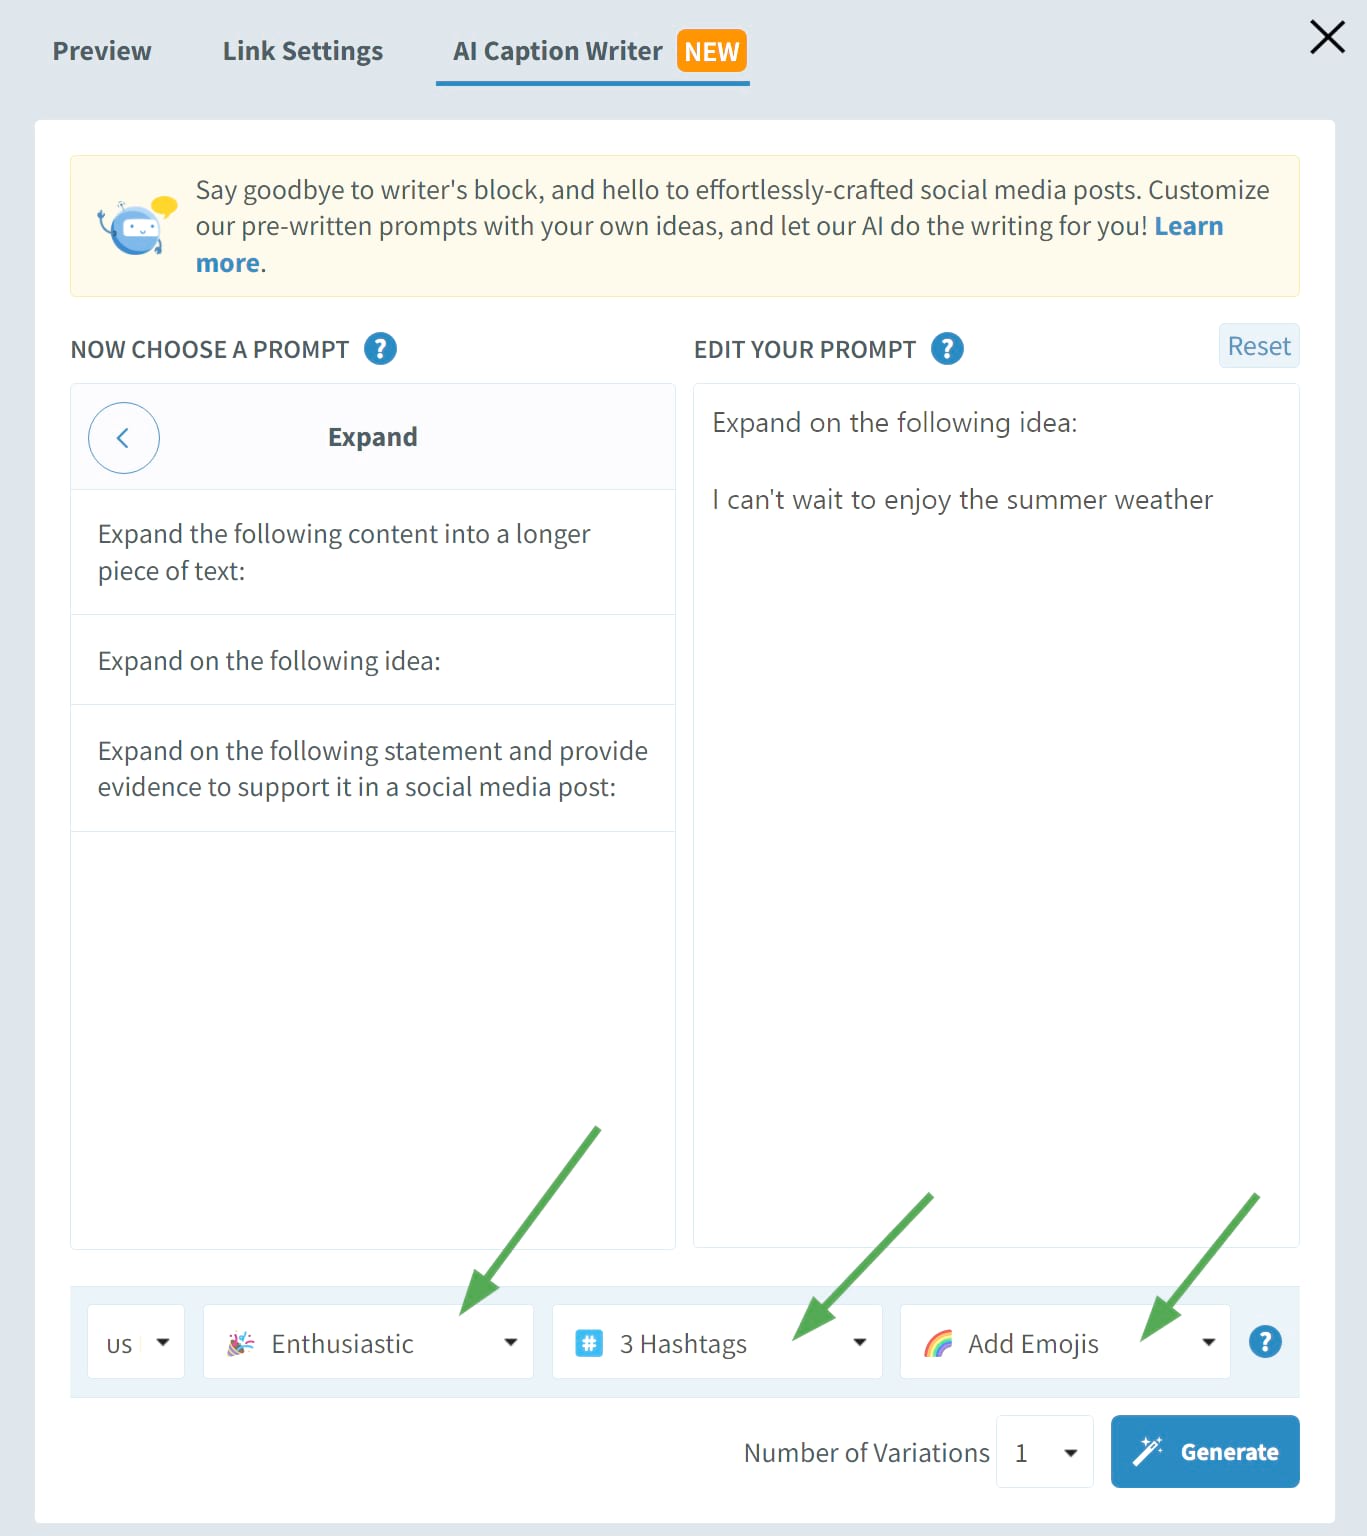
💡 Note: If this is your first time using the AI Caption Writer, you may also want to pick the language! The default is English (US), but SmarterQueue will remember your choice for future use.
- Choose how many results you want. While you can only have one First Comment, you can still generate multiple results and save any additional great ones to your Snippets!

- Click "Generate" and watch the results generate 🎉

- Once you're happy with your result, click the "clipboard" icon to copy the text, and add it to your post.

You now have an excellent First Comment to be published alongside your post 🎉
For more information on how best to use the AI Caption Writer, please visit: How To Use The AI Caption Writer